
Your Cart
Your shopping cart is currently empty.
Kitchen
All things cooking, cleaning, chilling and more for the hard-working heart of your home.
KITCHEN | 20 JULY, 2026
8 MIN READ
How to deep clean your fridge
Fresh food starts with a fresh fridge
The short version: Give your fridge a proper deep clean every three months, and the freezer compartment every six months. Warm soapy water or a baking soda and water solution is usually enough for everyday grime; avoid scouring pads, bleach and harsh chemicals, which can damage surfaces and seals. Clear the food, wash removable shelves and drawers, wipe down interior surfaces, and clean the door seals where grime likes to hide. There's no need to switch the fridge off when cleaning inside it, just work quickly while the door is open. You must unplug the fridge if you vacuum clean dust from the condenser coils. A final wipe-down of the exterior, handles and control panel finishes the job.
Your fridge runs 24/7, so it’s not surprising that it collects grime, crumbs and funny smells over time.
While it's good to wipe up spills as they occur, that doesn’t always happen, so giving your fridge a proper deep clean every three months helps keep it hygienic and smelling fresh. If your fridge has accessible condenser coils, keeping them free of dust may also help it run more efficiently.
Before you start
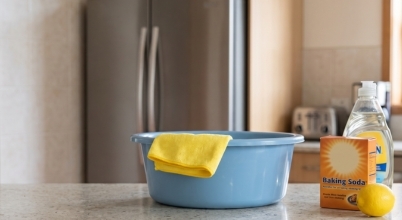
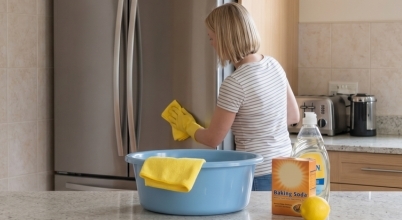
Before cleaning, prepare a few basic supplies. For most fridges, warm soapy water is enough to clean everyday spills and marks, so a soft cloth and dish soap are usually all you need. A mixture of baking soda and water is another option.
For tougher grime and stains, you have a couple of options. It’s best to avoid using scouring pads, which can scratch plastic and glass surfaces, as well as bleach and disinfectant. Fumes from powerful chemical cleaners can affect food, and bleach can be corrosive to rubber seals. If you do use it to remove mould from a gasket, it should be heavily diluted, seven parts water to one part bleach. To tackle mould and stubborn stains without resorting to harsh chemicals, make a paste of lemon juice, baking soda and water and apply it with a soft brush.
There's no need to switch your fridge off while cleaning the interior, but work quickly to minimise the time the door is left open, as the internal temperature will inevitably rise a little in the process. To give yourself a buffer, you could pre-lower the fridge's temperature by a degree or two a couple of hours beforehand, then switch it back to your usual setting (generally 3-4°C) once you're done.
The only time you'll typically need to unplug your fridge is when cleaning the condenser coils, if they are accessible on your model.

Watch our quick fridge cleaning video

Step 1: Clear the food
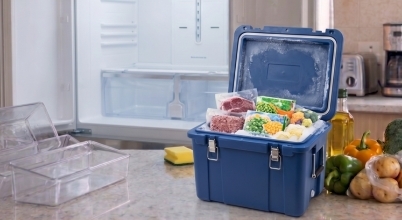
If your fridge isn’t overly full, move all the food into one or two areas rather than taking everything out. If you'd rather empty the fridge of meat, seafood, dairy and other perishables while you clean, store them in a cooler or esky with ice packs.
As you go, check use-by dates and inspect leftovers, sauces and condiments, throwing away any expired or spoiled food.
Step 2: Wash shelves, drawers and door inserts
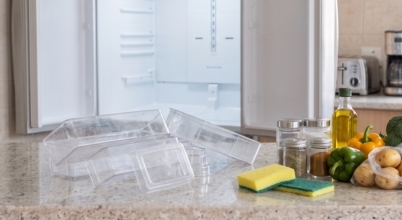
Remove the shelves, drawers and door inserts before washing them in warm soapy water.
Let the glass shelves sit on the kitchen bench for a few minutes before washing them, so they can come to room temperature. Placing cold glass shelves straight into hot soapy water can cause them to crack because of the sudden temperature change.
These removable parts often collect sticky residue from spills around corners, ridges and edges. Rather than scrubbing them with abrasive scourers, soak stubborn stains for a few minutes before washing.
Rinse everything well and dry thoroughly before putting back into the fridge.
Step 3: Wipe the interior
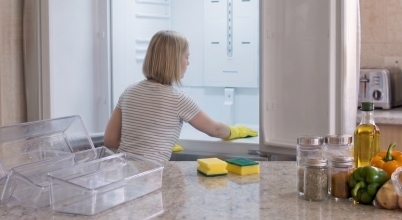
With the shelves and drawers removed, it’s easy to reach the corners and shelf grooves of the fridge.
A solution of baking soda and warm water is a natural, non-toxic option that remove light stains and neutralise odours without leaving behind a strong smell of its own. Mix 1 tablespoon of baking soda with 500 mL of warm water and use a soft cloth to wipe the walls, ceiling and back of the fridge.
Some people use white vinegar for its extra grease-cutting power, though its smell can linger for a while. Alternatively, a squirt of detergent in warm water will often suffice.
Once cleaned, dry the interior with a clean microfibre cloth before replacing the shelves and food. This is a good opportunity to reorganise your fridge, placing similar food types together in the best spots for them.
Step 4: Clean the door seals
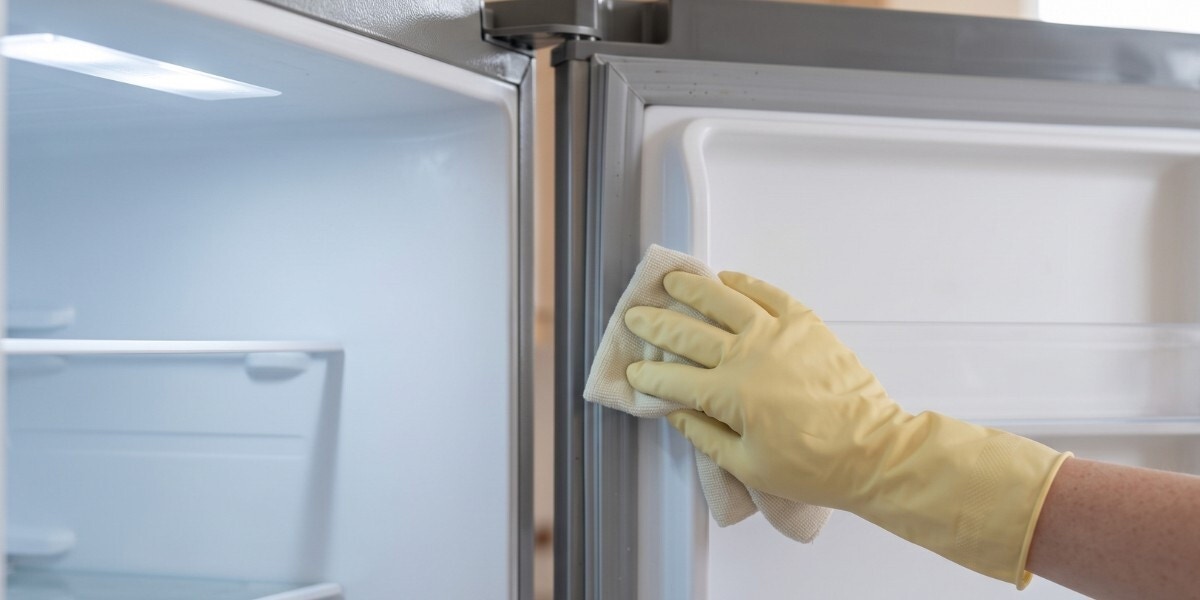
The gaskets - those rubber door seals around your fridge and freezer doors - are an easy area to overlook, but their concertina-like folds mean they're prone to collecting crumbs, moisture, grime and sometimes mildew.
Wipe the door seals with a damp, soft cloth, paying attention to the folds where dirt can hide. Keeping them clean helps the door close and seal properly, preventing cold air from escaping - which helps your fridge run more efficiently and could save you a little on running costs.
Step 5: Clean the freezer compartment
If your fridge doesn't have a freezer compartment, you can skip this step. Most modern fridge freezers are frost-free, so they don't need regular manual defrosting. However, the freezer compartment still benefits from a thorough clean every six months or so.
Move frozen food to the fridge or a cooler with ice packs while you work. Remove shelves and drawers if possible and wash them with warm soapy water. Wipe the inside of the freezer and the rubber door seals with a damp cloth, dry thoroughly to prevent residual moisture from freezing and then replace the food.
Step 6: Clean accessible condenser coils
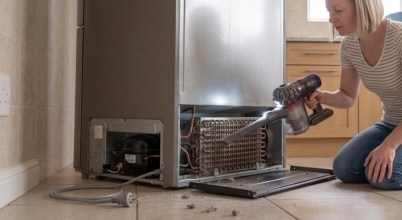
If your fridge has accessible condenser coils, unplug it from the power and carefully roll it forward a couple of feet until you can safely access the coils.
Depending on the model, the coils may be at the rear of the fridge or underneath it. Use a vacuum cleaner with a brush attachment to gently remove dust and debris. If a lot of dust has accumulated on the coils, cleaning it off can improve the condenser’s efficiency.
Many newer refrigerators have concealed condenser systems that don't require routine cleaning. If you can't locate the coils, this could be why, but it’s worth checking your owner's manual for guidance.
Step 7: Wipe the exterior
Finish by wiping the outside of the fridge, including the door handles and control panel, with a soft cloth and mild detergent.
If your fridge has a stainless steel finish, wipe in the direction of the grain to help minimise streaks and leave it looking its best.
How often should you clean a fridge?
A simple cleaning schedule can make the job much easier:
Wipe up spills as soon as they happen.
Deep clean the fridge interior every three months.
Clean the freezer compartment every six months.
Clean accessible condenser coils occasionally if your model has them and your owner's manual recommends it.
Deep cleaning your fridge doesn't just improve how it looks and smells - it can help it work more efficiently and is a good impetus to purge it of old and spoiled food.

Need another fridge for drinks? Get it fast with FREE Next Day Delivery!
Appliances Online has a huge selection of refrigerators, including bar fridges and wine cabinets that can really take your entertaining up a notch. And with our legendary FREE delivery we can usually get orders to 95% of Australians by the next day (Mon-Fri) if it's in stock. We even offer a paid Same Day Delivery option in NSW, QLD and VIC metro areas if you order before 12pm on weekdays.
Plus, we’ll save you from an unsightly nature strip by taking your old fridge away for safe recycling, for free. Check out our full range of fridges here, and if you have any questions on finding the best fridge for your home, read our Fridge Buying Guide, call our friendly team 24/7 on 1300 000 500, or message us via the chat icon at the bottom of your screen.

Oli is Appliances Online's editor and blogger, with almost two decades of lifestyle-related writing and editing to his name. With a mission to help you buy better and live smarter, his brand loyalty will forever belong to the appliance manufacturer that develops a self-emptying dishwasher.
Latest Articles
HOME LIVING+
8 OCTOBER 2026
10 of our best selling indoor bar fridges in Australia 2026
Find the perfect compact drinks fridge for your home
BBQ & OUTDOOR
1 OCTOBER 2026
5 of our top best selling outdoor bar fridges in Australia 2026
Alfresco fridges to keep your drinks icy cold this summer.
BBQ & OUTDOOR
25 SEPTEMBER 2026
Indoor vs outdoor bar fridges
Important differences to know about
ECO & SAVE
21 SEPTEMBER 2026
How to choose more eco-friendly appliances for your home
There’s more to it than just energy efficiency
More Like This
HOME LIVING+
8 OCTOBER 2026
10 of our best selling indoor bar fridges in Australia 2026
Find the perfect compact drinks fridge for your home
BBQ & OUTDOOR
1 OCTOBER 2026
5 of our top best selling outdoor bar fridges in Australia 2026
Alfresco fridges to keep your drinks icy cold this summer.
BBQ & OUTDOOR
25 SEPTEMBER 2026
Indoor vs outdoor bar fridges
Important differences to know about