
Your Cart
Your shopping cart is currently empty.
BBQ & Outdoor Living
From King of the Grill to sip'n'chill, let's make the most of the great Aussie backyard!
BBQ & OUTDOOR | 13 SEPTEMBER, 2024
12 MIN READ
BBQ like a pro with our expert tips
Let's make you Boss of the BBQ.
When summer rolls around you want to have your grill situation sorted. However, if you don’t, fear not as our in-house BBQ expert Russ is here to give you a better understanding of what to look for based on your own needs and preferences.
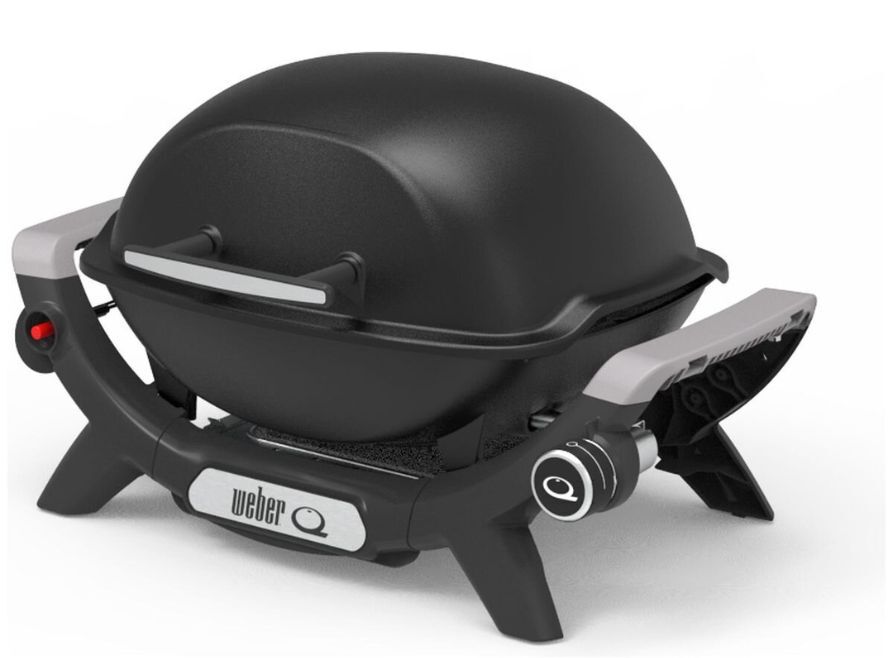
Portable BBQs
If your summers consist of long road trips to caravan parks, family outings to the beach or travelling from tourist destination to tourist destination, then this style of BBQ is a great option.
The Weber Baby Q will easily cook for two adults and can be stretched (depending on what you are preparing) to feed a family of four. Bacon and eggs for brekkie or a sizzling steak for dinner are just some of the scrumptious dishes you can create with a Weber Baby Q.
Designed as a take-anywhere gas grill, the Baby Q weighs in at 10.8kg, making it easy to carry to your favourite picnic spot or pack it away in the car with minimal effort. With the ability to connect to even the smallest of gas bottles, such as camping propane tanks, no extra connection or bayonet change is required.
With an entire range of extra accessories available, from pizza stones and roasting holders to breakfast plates and chicken thrones, mealtime variety is just an optional accessory away. Plus, with the legendary Weber after-sales and customer service you can rest assured that BBQing can't get any easier.
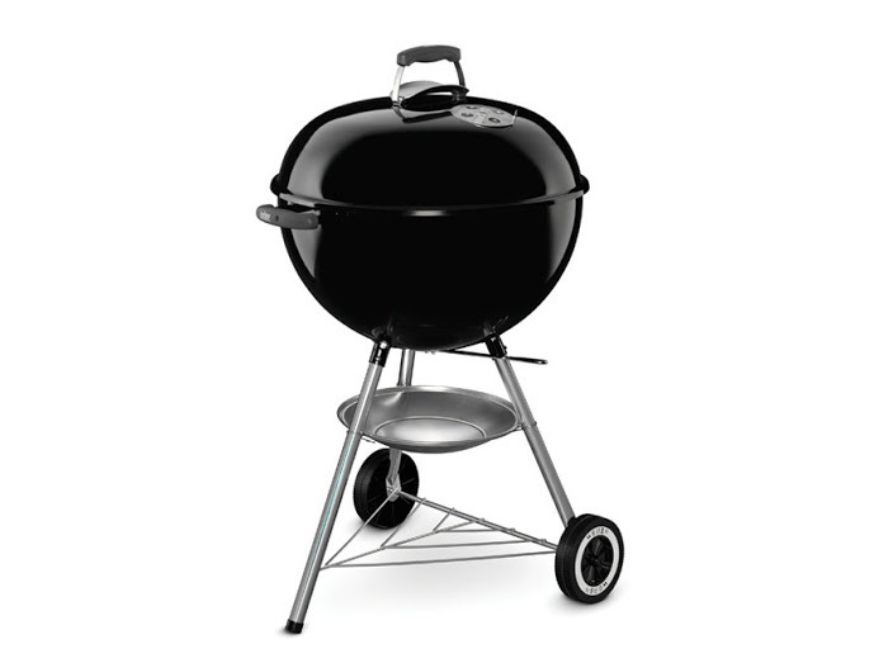
Charcoal BBQ
With the continued popularity of TV cooking shows like Masterchef and MKR, there is no better time to step into the world of live fire cooking than this summer.
The Weber Kettle series of charcoal grills are one of the most reliable, well-built BBQs in outdoor cooking. With the ability to cook Low n’ Slow – a favourite style of grilling in the U.S, or direct fire cooking South American-style, the Weber Kettle will hold its own in an overcrowded market.
Long lauded as one of the most straightforward and most versatile grills to use, the Weber kettle hasn’t changed its design all that much since its inception in the 1960s. With a built-in hood thermometer, having complete control over your cook is much more manageable, and thanks to the bottom air vent, the kettle has greater oxygen transfer through the chamber allowing for steadier temperatures and a more even cook.
One important thing to remember with this grill is because you are cooking with live fire, flying embers is a risk, so be mindful of all current total fire ban warnings.
Lightweight and with a relatively small footprint the ability to take this grill with you on camping trips or holidays to your favourite caravan park is simplistic, accessible and exciting.
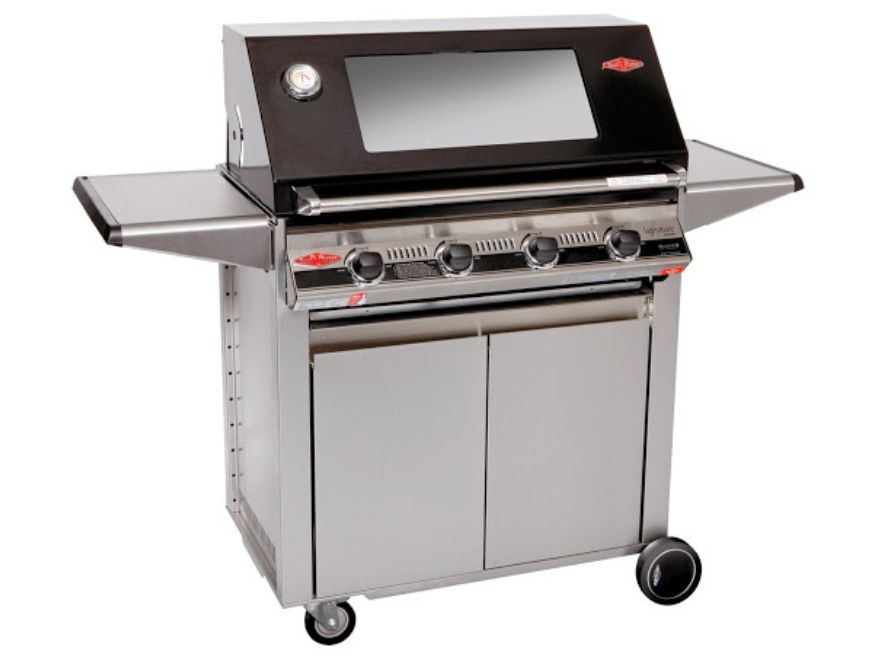
Freestanding BBQs
As a larger unit, having a freestanding BBQ becomes more than an appliance, it becomes a lifestyle as well as a centrepiece for your alfresco area.
Freestanding BBQs are just that – they are installed atop a moveable cart that can be locked into place with the castors on the wheels or left unlocked to be able to move around your backyard area. Plenty of optional extras for different cooking styles are available, as well as heavy-duty covers to protect your investment.
These are the three main types of BBQs and the ones you will commonly see in your search for the perfect outdoor cooking companion. Now, once you have found the ideal BBQ to suit you and your lifestyle, the next thing to do is get the maximum value from it.
Our BBQ expert has included what he thinks are some of the best tips and hacks to up your grill game and BBQ like a pro. Remember, cooking is a culinary adventure so don’t be afraid to experiment, try something different and have fun!
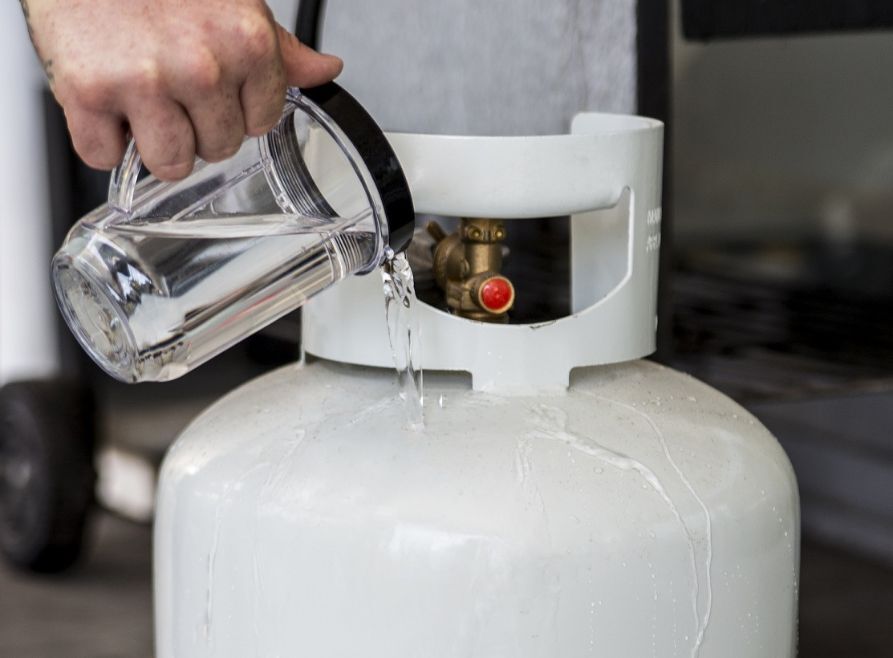
Check the gas levels in your gas bottle like a pro
There’s nothing worse than getting halfway through your cook, then bam – the gas goes out. Besides having a gas safety gauge or measuring dial attached to your gas lines, there is still a surefire way of checking the level. Pour hot water down the side of your gas bottle (WARNING: not boiling water and not on the top of the bottle!!).
Let the bottle sit for a few seconds and if you see a condensation line that’s your gas level! If you can’t see a condensation line, run your hand down the side of the bottle you poured water over, and feel for a temperature difference between the top and base- where the temperature changes will indicate how much gas you have left.
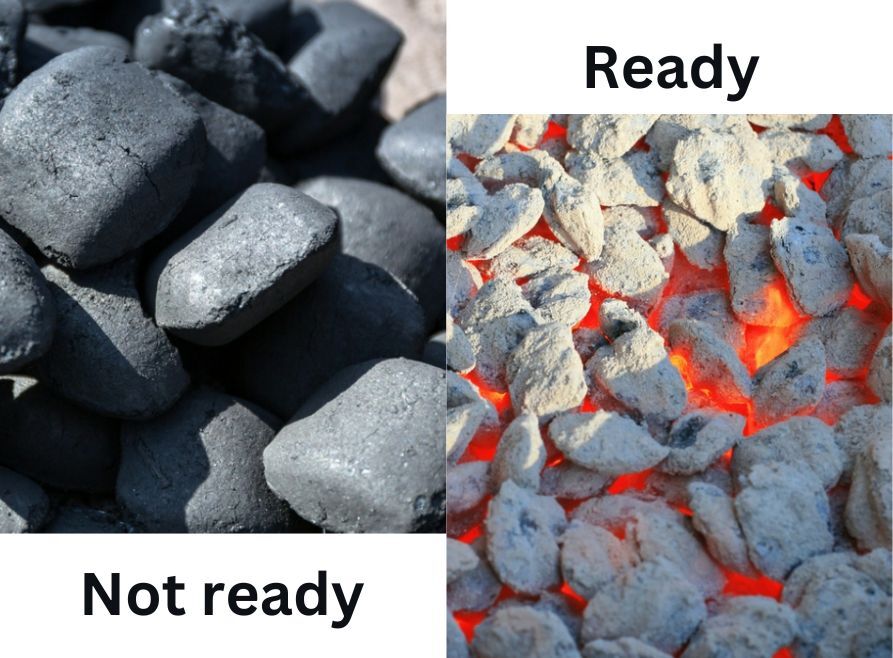
Using charcoal? Light early!
Waiting for charcoal to heat up can feel like a lifetime, so make sure you light it early to avoid disappointment later on. Allow up to 30 minutes for the charcoal to ash over and turn white – once this happens you are good to start cooking!
Compared to our more primitive ancestor’s fire-starting just isn’t human nature anymore, so lighting charcoal and keeping it lit can be quite a tricky task, especially for first-timers. To help you spend less time stressing and more time grilling, we’ve put together easy step-by-step guides on how to fire up your charcoal BBQ.
Chimney starter
A chimney starter is by far the easiest and most effective way of lighting charcoal and can be purchased separately from any BBQ store.
With fire lighter cubes
Place 2-4 fire lighter cubes (these can be bought at your local hardware store or supermarket) at the base of the chimney.
Pour the charcoal (briquette or lump) on top.
Light the fire lighters from underneath, making sure they are well alight before placing the chimney on your grill grates.
Allow the charcoal to burn, ash over and turn white- about 20-25 minutes. Take caution as flames can appear at the top of the chimney – this is a common occurrence due to the flow of oxygen.
Once ashed over pour them into your charcoal baskets, offset smoker or charcoal bbq, being careful of embers and the heat from the chimney
You’re now ready to start grilling.
Without fire lighter cubes:
This method still requires a chimney starter but takes away the need for fire lighter cubes. However, you will need an open flame from an outdoor camp stove for this method to work.
Fill the chimney with your favourite charcoal (briquette or lump).
Light your gas burner or camp stove and switch it to high.
Place the chimney directly on your burner or stove.
Let the charcoal at the base of the chimney ignite –about 2-3 minutes– (smoke will start to come out the top). Once this happens, leave your burner on high for another 5 minutes.
After 5 minutes, turn off the burner and let the chimney sit for a further 15-20 minutes while the charcoal ashes over.
Once ashed over, pour the contents of the chimney directly into your charcoal basket, offset smoker or charcoal bbq.
You’re now ready to start grilling.
Directly in your charcoal grill
This method is more laborious compared to using a chimney starter. However, it’s still an effective method of lighting charcoal and takes away the need to purchase a chimney.
Make sure all air vents in your charcoal BBQ are open, to ensure the fire receives the necessary amount of oxygen to keep it alight.
Remove your BBQs grill grates, and place 2-4 fire lighter cubes into the base of your grill.
Mount charcoal (following the instructions on the charcoal bag for the right amount) on top making sure you can still reach the fire lighter cubes with a match or lighter.Light the fire lighter cubes. Consider using longer matches or lighters for added safety and remember to always be cautious around open flames.
Allow the charcoal to burn and ash over – around 30-45 minutes. The time it takes for the charcoal to ash over depends on the amount of airflow flowing through your grill.
Once it has ashed over, space out the charcoal with BBQ tongs, and replace the grill grates.
You’re now ready to start grilling.
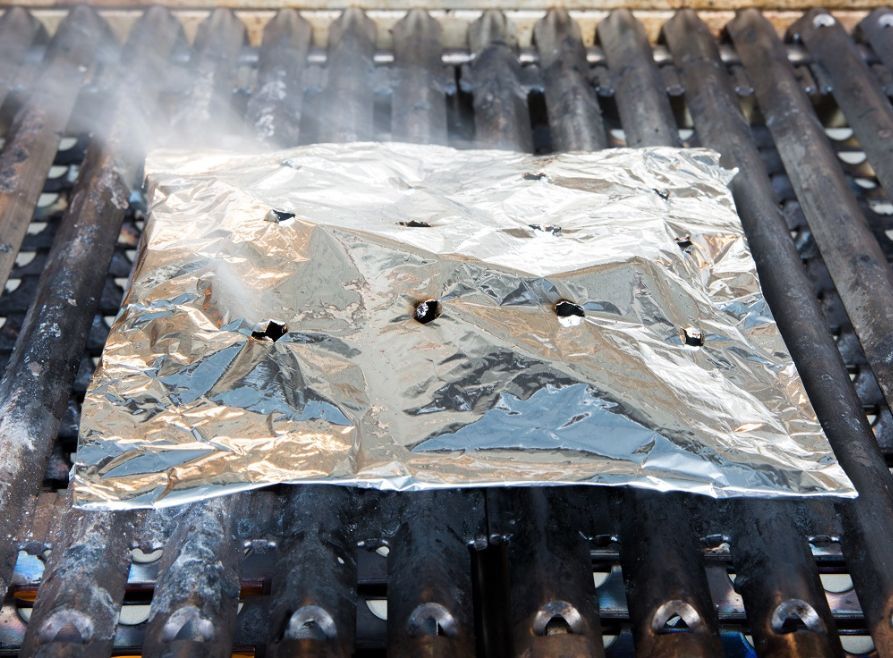
Turn your gas BBQ into a smoker
Don’t have a charcoal or offset smoker? No worries! With this simple hack, you can add delicious smoky flavour to your food. Simply wrap smoking wood chips into a foil envelope, pierce holes into it, so the smoke can escape, and then place it directly on top of the burner.
Just remember to soak your chips in water for a few minutes (so they don’t burn off as quick) and keep your food indirect to your heat source to ensure a Low n’ Slow style of cooking, which is what works best.
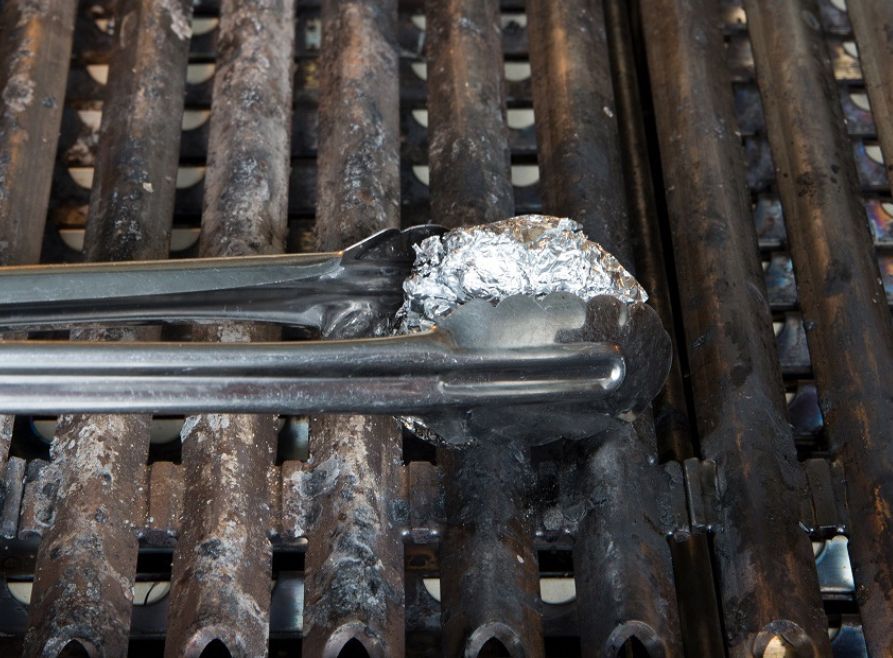
How to create a foil envelope for smoking
Using ordinary kitchen foil, tear off two sheets the same size – about 20cm long.
Lay both pieces on top of one another.
Fold the sides together (a few millimetres in from the edge), creasing along the edge as you fold, making sure to leave one side unfolded (this is the opening of the envelope).
Carefully put your hand into the opening and delicately separate the two pieces of foil to form a pouch.
Using the open end put 2-3 handfuls of smoking wood chips inside the envelope.
Fold the open side shut, as you did in step three.
Poke holes in the top side of the envelope (this will allow smoke to escape and fill your BBQ)
Place the envelope directly on top of the burner or grills and set your gas BBQ to high.
Close the lid of your BBQ and wait for the envelope to start smoking- we recommend opening the lid and checking every 5 or so minutes.
Once the pouch starts to smoke, place your food on the complete opposite side of the bbq and adjust the burner temperature to the desired cooking temp (nb. purchase a probe thermometer or use the bbq hood thermometer on your unit).
Close the lid and let your food soak up that beautiful smokey goodness.
A quick guide to pairing food with wood chips
Different foods work better with different types of woodchips.
Wood chip type | Works best with | Flavour characters |
|---|---|---|
Alder | Fish, poultry, pork | Mild and delicate |
Apple | Beef, poultry, pork | Slightly sweet but dense |
Cherry | Poultry and pork | Slightly sweet and fruity |
Peach | Poultry and pork | Slightly sweet and woodsy |
Pear | Poultry and pork | Slightly sweet and woodsy |
Hickory | Beef, poultry, pork and cheeses | Pungent and bacon-like |
Maple | Poultry, ham and vegetables | Mildly smokey with a hint of sweetness |
Oak | Beef, poultry, pork | Assertive, acidic - blends well with sweet chips |
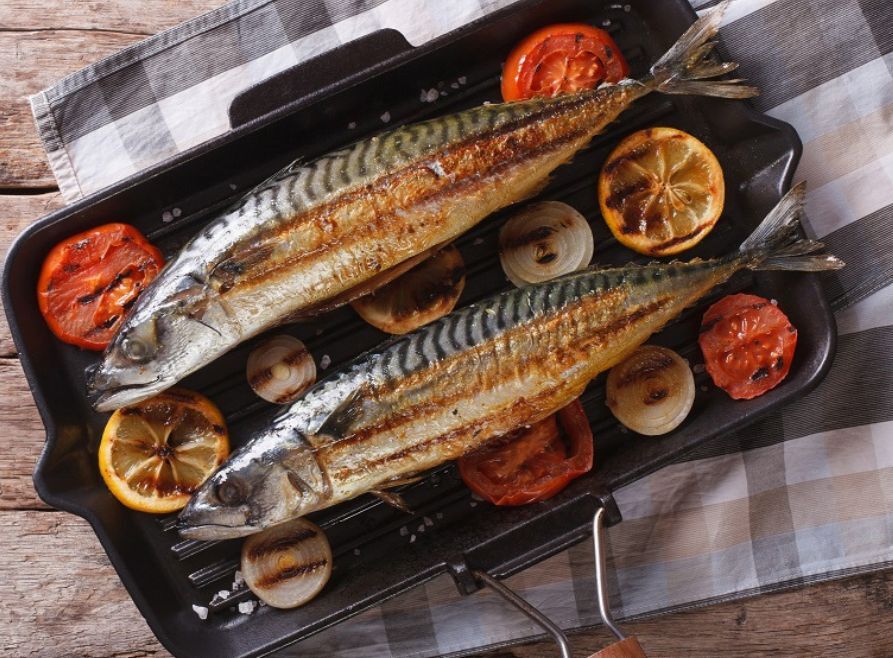
Cook fish on top of citrus slices
Have you ever purchased an expensive piece of seafood only for it to stick to your BBQ when grilling?
Take some slices of your favourite citrus (Lemons, lime, oranges etc.), put them directly on your grills, and then place your seafood directly on top. Not only will the citrus stop seafood from sticking to the BBQ, but it will also infuse your food with plenty of flavours.
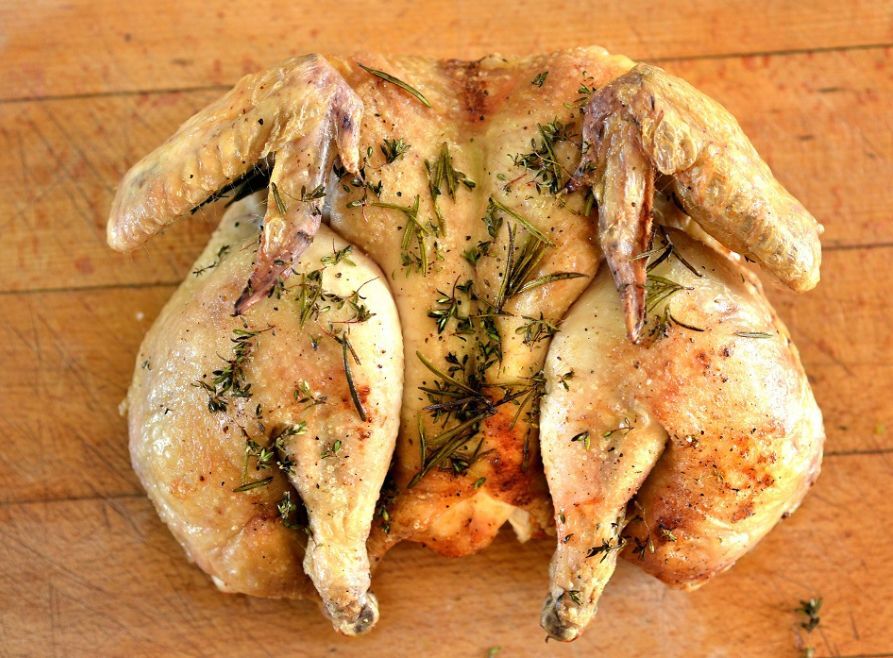
Spatchcock that chicken!
Having mouthwatering grilled whole-chicken for dinner is impressive and delicious, but can also be intimidating for those who have yet to cook one. If you are one of these people, or you simply just want a new method of preparing chicken, the easiest and most straightforward way is called spatchcocking. This technique will cook the chicken evenly and will help impress every one of your guests.
How to spatchcock a chicken
Take a raw whole chicken and turn it breast side down.
Start at the thigh and with kitchen shears or chicken scissors, cut along one side of the backbone toward the neck.
Turn the chicken around and cut the opposite side of the backbone from the neck to the thigh. (you can either discard the backbone or save it to make homemade stock)
Flip over the chicken and press the breast with a flat palm to flatten and open the chicken right up.
Start grilling.
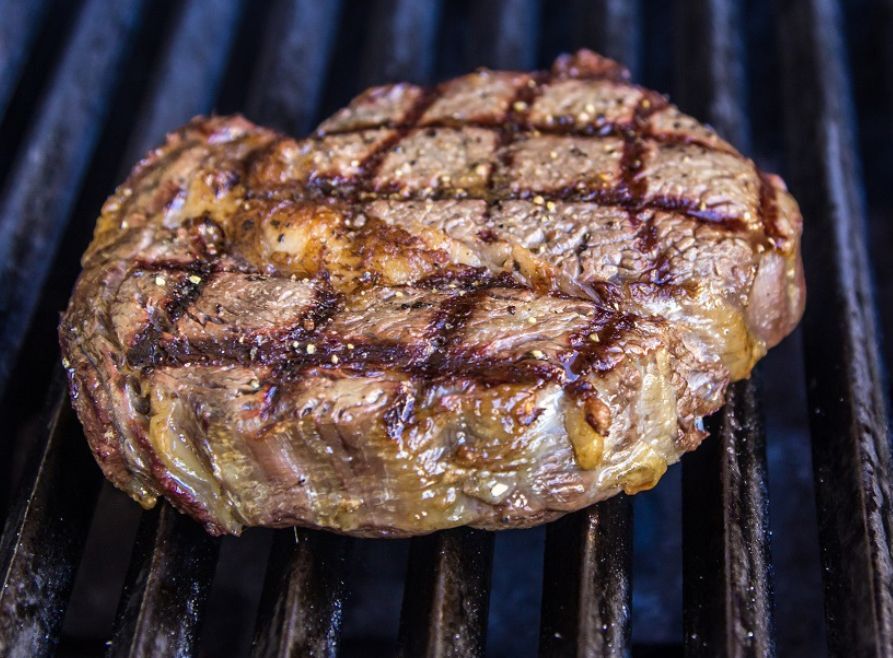
Become a grill master with grill marks
Ever wondered how top-end steakhouses create those criss-cross marks on their steaks? Well, it’s easier than you think.
The easiest way to do it is to follow the '10 & 2 rule' – face the steak towards ten on the clock and cook halfway through. Now without flipping, rotate the steak to 2 on the clock and grill further. Flip & repeat on the other side to your desired doneness.
Clean your grill the easy way with foil
Protecting your BBQ is paramount to ensuring a string grill game for years to come, so here is a simple way to make your BBQ look showroom-ready.
Scrunch up some regular foil (about the size of a cricket ball), pick it up with tongs and scrub your grills vigorously while still warm – this will remove any of that caked-on food residue.
Important to know
Be aware of total fire bans in your area. We are lucky to live in one the best countries for summer, but with that comes great responsibility during the grilling season. In a total fire ban, no solid fuel fires can be used- charcoal or wood fires (unfortunately, this also means no pizza ovens). A gas grill can be used as long as it is maintained by an adult and is located near running water. Remember, always check the RFS website for more info.
Rural Fire Service Websites for each state:

Appliances Online's resident BBQ expert, Russ has an unhealthy obsession with grilling brought on by the growth of an epic beard and a deep love for the United States. If he's not talking about all things BBQs or grilling the perfect steak, you'll find him tending to fires in his offset smoker.
Latest Articles
HOME LIVING+
22 JUNE 2026
The BIGGEST discounts in Appliances Online's EOFY Sale 2026
Don't miss out on HUGE savings
KITCHEN
18 JUNE 2026
10 of the most popular cooktops in Australia 2026
Effortless cooking options for every kitchen style.
KITCHEN
18 JUNE 2026
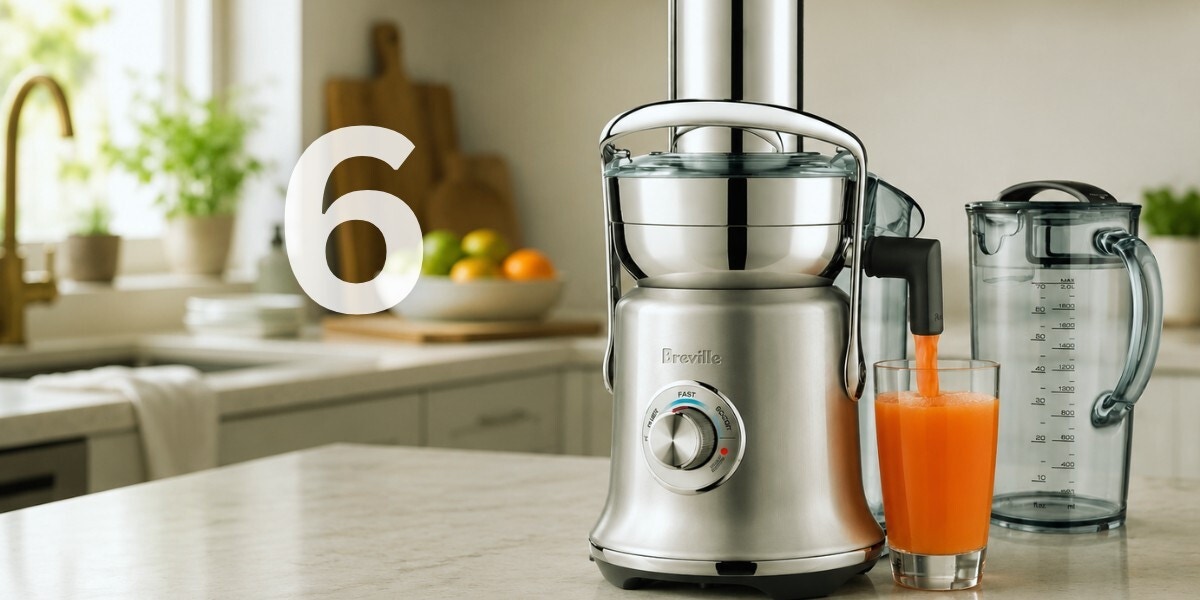
6 of our most popular juicers in Australia 2026
Juice doesn't get fresher than this.
LAUNDRY
15 JUNE 2026
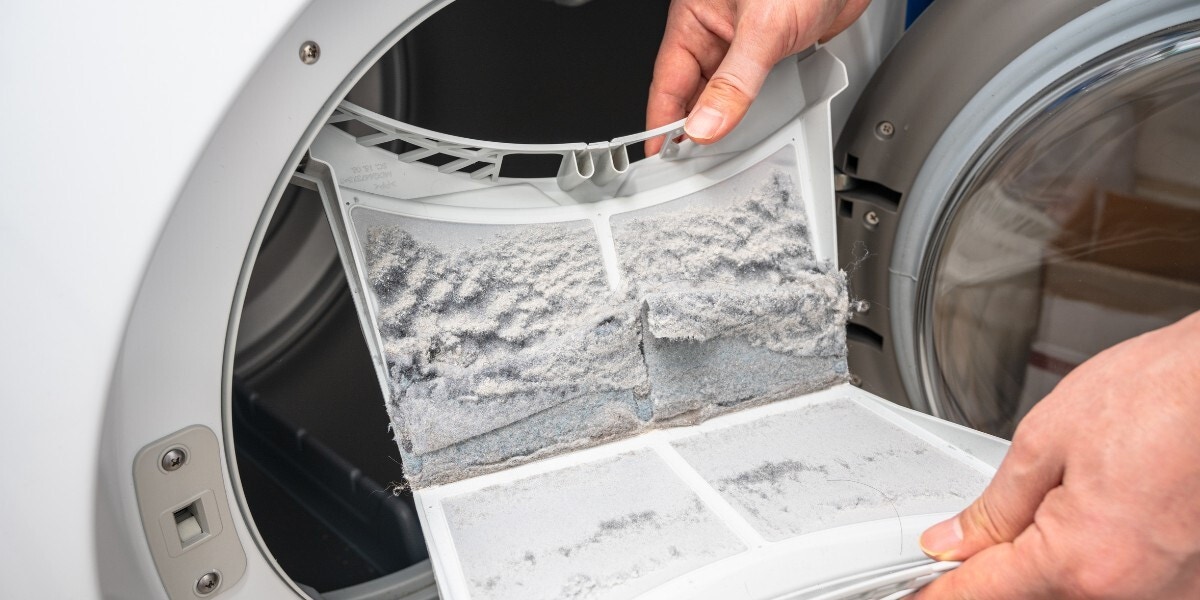
How to clean your clothes dryer
A cleaner dryer is safer, more efficient and cheaper to run
More Like This
HOME LIVING+
22 JUNE 2026
The BIGGEST discounts in Appliances Online's EOFY Sale 2026
Don't miss out on HUGE savings
KITCHEN
18 JUNE 2026
10 of the most popular cooktops in Australia 2026
Effortless cooking options for every kitchen style.
KITCHEN
18 JUNE 2026
6 of our most popular juicers in Australia 2026
Juice doesn't get fresher than this.
